TABLE OF CONTENTS
Introduction
Starting from version 1.3 of the Sendent app for Nextcloud, it is possible to edit HTML snippets using a new WYSIWYG editor available in the settings page. With the new WYSIWYG editor you can use commonly used formatting tooling to change the snippets we insert in the email body.
Get Started
To start using the new WYSIWYG editor, you only need to update the Sendent app for Nextcloud to version 1.3
Start editing right after updating the app
As soon as you open the settings page after updating the app, you will notice there is a "Toggle editor" button available next to the respective snippet settings.
 Toggle editor button
When you click on the button the WYSIWYG will appear and you can start editing your snippet right away.
 Editing snipper example
Editing features
Inserting your company logo
To insert your company logo into the snippet, you can use the "Logo" button, located in the second row at the top of the WYSIWYG editor. The editor will insert a blank rectangle where your cursor is located within the editor. Our Outlook Add-in will use this 'placeholder' to insert the logo when placing the snippet into the email body.
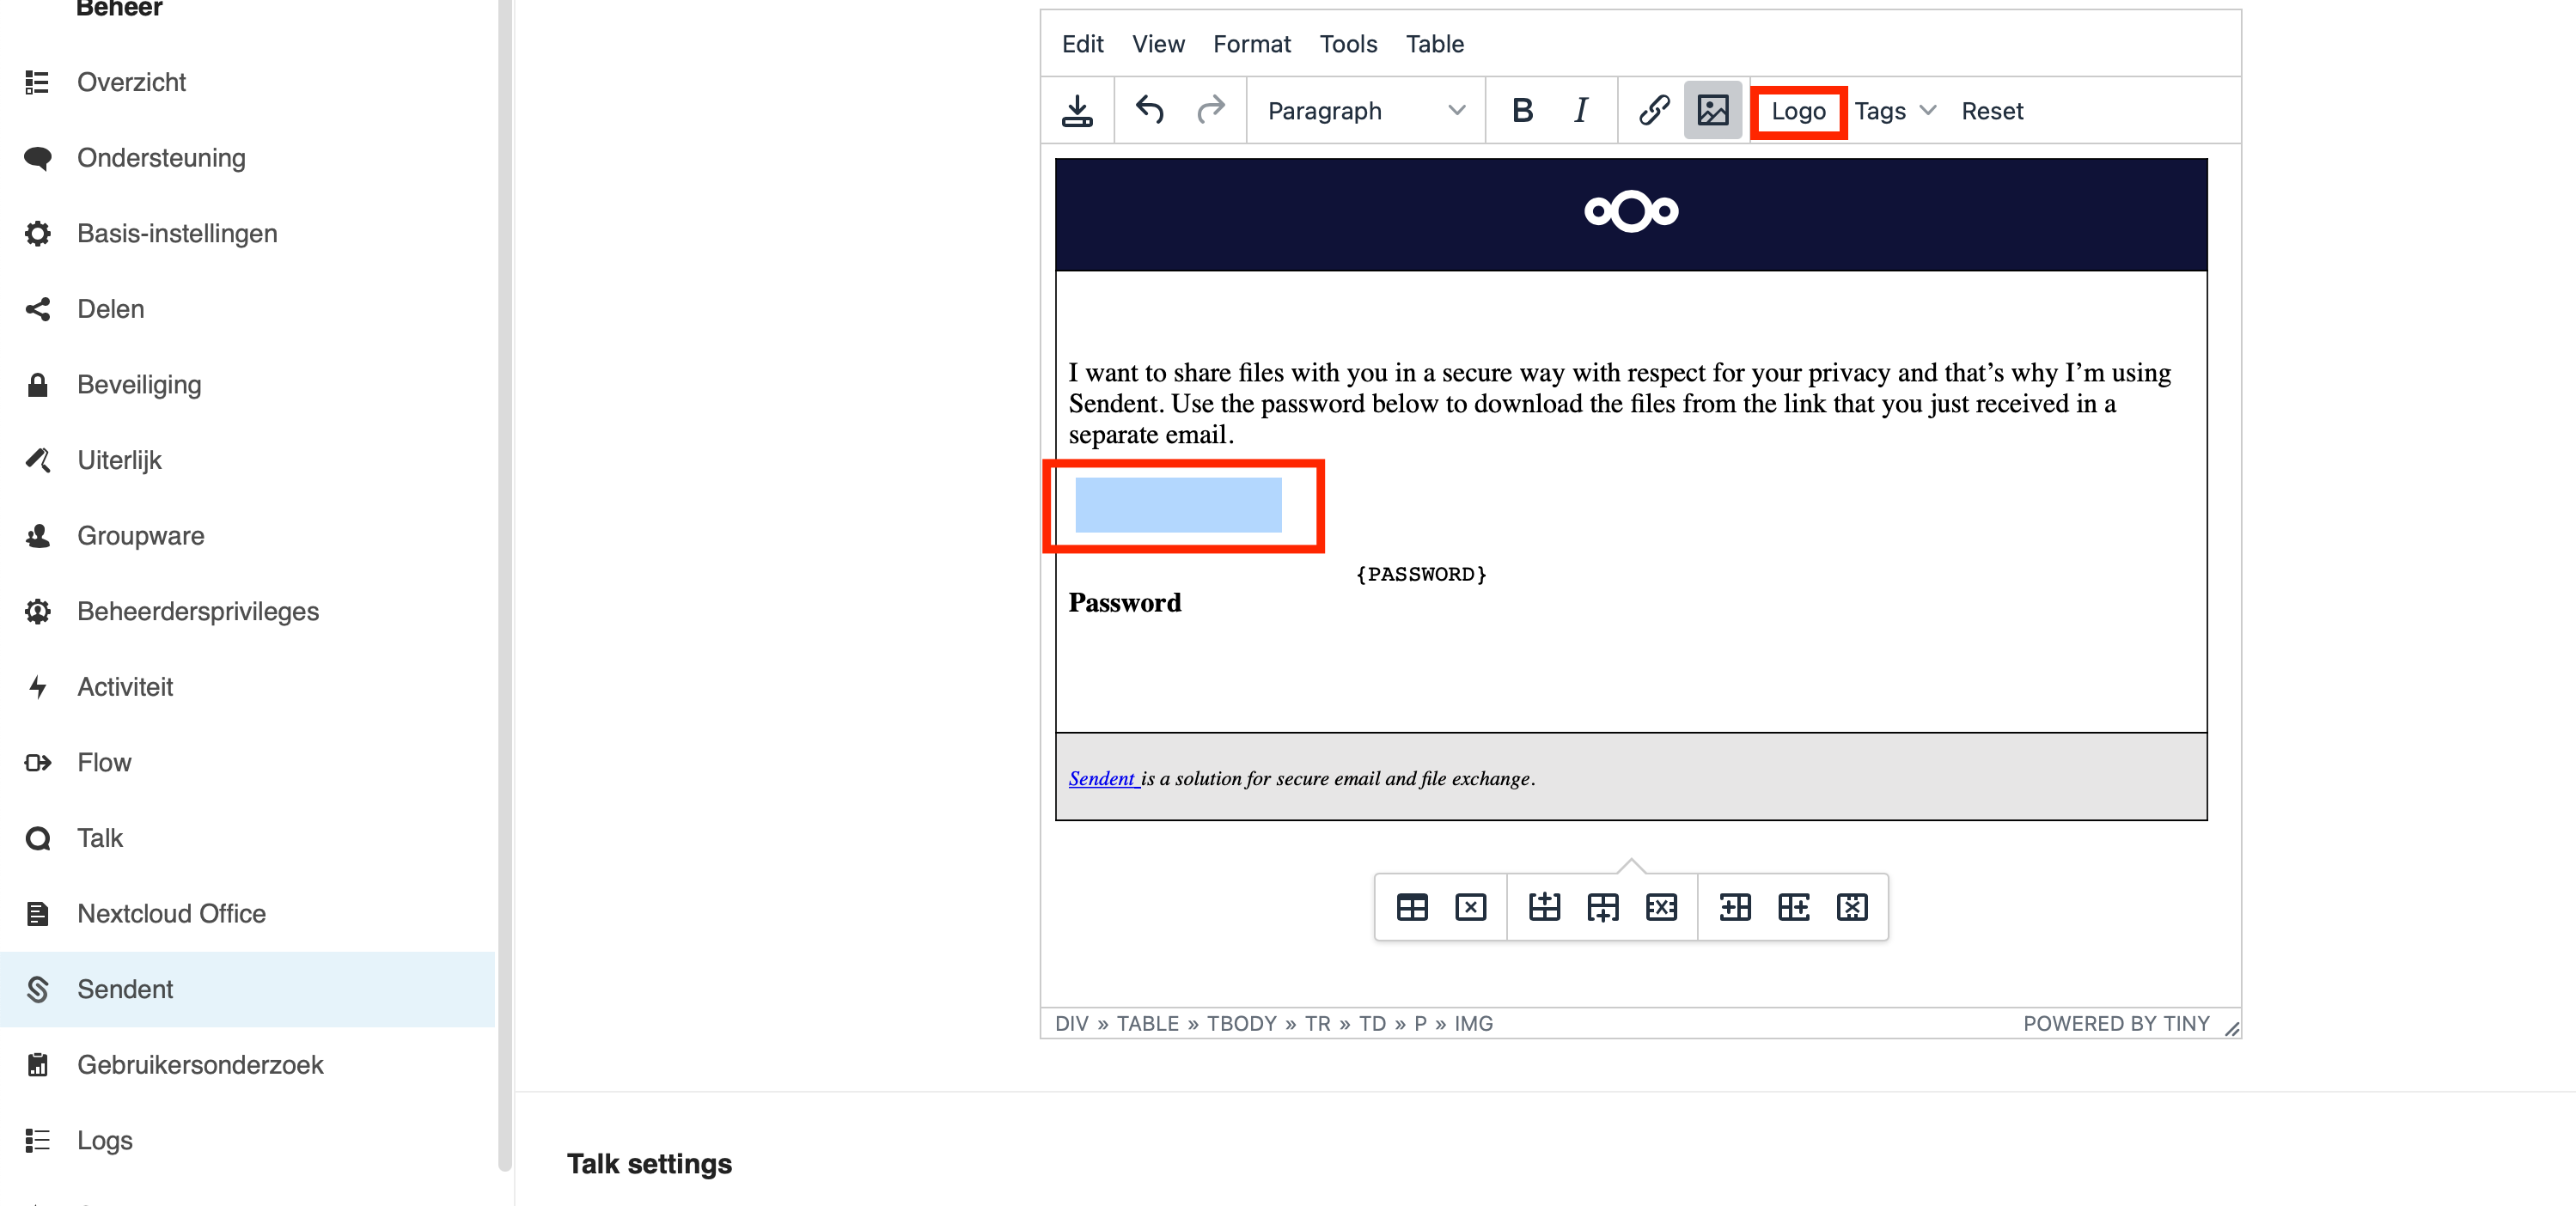
Inserting logo example
The Outlook add-in will replace certain tags within the HTML snippet template with actual information relevant to the receiver. The WYSIWYG editor is equipped with a feature to place the tags at a chosen location within the HTML snippet so the Outlook add-in will eventually make sure the tags are replaced with the actual data at the location defined in the HTML snippet. To insert tags you can simply click the "Tags" button and choose the tag you wish to insert at your cursor position.
 Inserting tags example
Customizing HTML snippets
The Outlook add-in allows you to customize the HTML snippet where the download link is inserted in the mail body. This feature is not available for Basic users and only accessible for Professional and Premium plans of Sendent.
The provided snippets are more samples, you need to modify the colour scheme, logos or formatting yourself.
| Key | Value | Default |
|---|---|---|
HtmlSnippetPublicShare | Any HTML containing placeholders for the required fields. | {URL}<br>{EXPIRATIONDATE}<br>{PASSWORD} |
HtmlSnippetUploadFiles | Any HTML containing placeholders for the required fields. | {URL}<br>{EXPIRATIONDATE}<br>{PASSWORD} |
HtmlSnippetSecureMail | Any HTML containing placeholders for the required fields. | {URL}<br>{EXPIRATIONDATE}<br>{PASSWORD} |
HtmlSnippetPassword | Any HTML containing placeholders for the required fields. | {PASSWORD} |
HTML snippet example
Modify Logo
Note: In the latest version of Sendent you can use the {LOGO} tag instead of the described procedure below.
Within our HTML sample snippets we use something called "cid" tags (for embedded content). In the snippets you can find it under "src='cid:logo.png@logo'" in the img tags (without double quotes).
There are two options:
1. Replace the cid string with a reference to your own logo hosted on the same domain as your email addresses.
2. Replace the file located at: ...<program files>\Sendent Outlook\Resources\Images\sendent_logo_transparant.png with your own logo.
Please note though, every time that the add-in is updated you have to replace this file.
Available fields in snippets{URL} or {0} - Share link *
{PASSWORD} or {1} - Share password **
{EXPIRATIONDATE} or {2} - Share expiration date *
{FILES} or {3} - List files (uses <ul><li> tags)
{RECIPIENTS} - List recipients
{FROM} - List from sender (e.g. info@sendent.nl)
{SUBJECT} - Subject name
{CURRENTDATE} - Current date
{CURRENTTIME} - Current time
{LOGO} - Display set Nextcloud logo from theming
The use of custom HTML snippets containing CSS is supported. Whenever designing a custom HTML snippet, it is recommended to use HTML tables. We recommend using HTML tables as it is more convenient for the end-user to copy for example the password from the email. Other techniques may cause inconveniences. The main issue is that by default Windows behaviour the selection of any word also adds a space at the end of the selected word. Therefor when an end-user copies the password, they will accidentally copy a space with the password. When the end-user attempts to authenticate with the share this will fail due the copied password containing an unintended space at the end of the password.
* = REQUIRED
** = REQUIRED unless “Password communication mode” = “include in separate email”
Reset HTML snippet to default
The snippet can be reset to it's default layout by clicking the "Reset" button in the WYSIWYG editor.